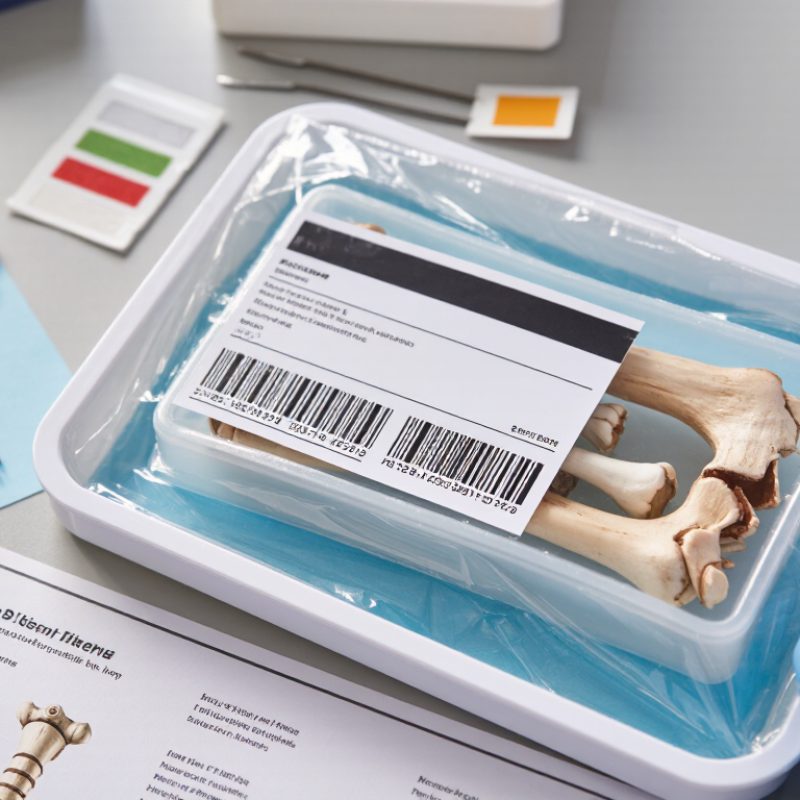
5 Tips to Check Orthopedic Implant Sterilization Standards?

Time:2026-10-19 Author:Mason
0%

Orthopedic implants enter the body, so sterilization evidence must be clear, traceable, and technically credible. A clean package is not proof of sterility. The real question is: How to check the sterilization standard of orthopedic implants without relying on appearance alone? This guide introduces five practical checks for manufacturers, hospitals, distributors, and quality teams.

The review should begin with the implant label, packaging seal, sterilization method, lot number, and expiration date. These details should match the release records and supplier documentation. Depending on the method, relevant standards may include ISO 17665 for moist heat, ISO 11135 for ethylene oxide, or ISO 11137 for radiation sterilization. Product-specific validation remains essential. One standard cannot answer every question.

Look closer. Request sterilization certificates, cycle parameters, biological indicator results, packaging validation, and deviation reports. Confirm that routine monitoring reflects the validated process, not only an ideal laboratory cycle. Inspect damaged seals, crushed trays, moisture, and unclear labels before use. A small tear matters. Staff experience also matters, because storage and transport can weaken sterile barriers after processing. No checklist is flawless. Records may be complete but poorly interpreted, while a confident supplier may overlook a recurring packaging problem. Independent audits, competent microbiology review, and current regulatory guidance provide stronger assurance. These five tips will help readers identify missing evidence, ask sharper questions, and make safer, documented decisions about orthopedic implant sterilization.

5 Tips to Check Orthopedic Implant Sterilization Standards?

Define Sterilization Requirements for Orthopedic Implants

Sterilization requirements for orthopedic implants should begin with intended use, material composition, and packaging design. An implant entering bone needs a defined sterility assurance level, commonly SAL 10⁻⁶. Clean is not sterile. Surface appearance cannot confirm microbial safety.

The selected method must match the implant’s metal, polymer, coating, and instruments. Heat-sensitive components may require a validated low-temperature process. Moisture, radiation, or gas exposure can change strength, color, surface finish, or packaging integrity. Requirements should also address bioburden limits, endotoxin control, residual chemicals, and transport conditions. A sealed tray may look perfect while a weak seal allows contamination.

Validation should include process qualification, routine monitoring, and documented acceptance criteria. Testing should challenge the hardest-to-sterilize locations, including narrow channels, joints, and porous surfaces. Applicable standards can guide methods for steam, radiation, or gas sterilization, but they do not replace product-specific evidence. Manufacturing teams should review biological indicators, physical records, packaging tests, and shelf-life data together. In practical audits, missing small details often creates larger uncertainty. A rushed load review is one example. Reprocessing instructions for reusable instruments must be equally clear, including cleaning steps, maximum cycles, inspection points, and drying requirements. Independent quality review strengthens the record, although no checklist can correct a poorly designed process.

Verify Validated Sterilization Methods and Equipment

5 Tips to Check Orthopedic Implant Sterilization Standards?

Verify Validated Sterilization Methods and Equipment

Tip 1: Confirm that the sterilization method matches the implant material, geometry, and packaging. Porous surfaces, narrow channels, and complex instruments may require different validated cycles. A familiar method is not automatically suitable. Tip 2: Review validation evidence, including installation, operational, and performance qualification. The records should show consistent temperature, pressure, exposure time, and load conditions.

Tip 3: Inspect the equipment and its maintenance history. Sensors must be calibrated, chambers must be inspected, and alarms must function correctly. Small deviations matter. Tip 4: Check routine monitoring practices. Physical readings, chemical indicators, and biological indicators should support the release decision. Their placement should represent the hardest-to-sterilize locations, not merely the easiest ones.

Tip 5: Examine traceability from each implant to its sterilization cycle. Records should identify the load, operator, equipment, test results, and release approval. Packaging integrity also deserves attention after processing. A damaged seal can compromise an otherwise successful cycle. In practice, I have found that paperwork may look complete while one missing load detail weakens confidence. That point deserves review, not assumption. When evidence conflicts, delaying release is safer than relying on experience alone. નિયમ

5 Tips to Check Orthopedic Implant Sterilization Standards? - Verify Validated Sterilization Methods and Equipment

Tip What to Verify Relevant Standard or Reference Objective Evidence Equipment and Process Checks Practical Acceptance Criteria
1. Confirm that the sterilization method is appropriate for the implant Check whether the selected method is compatible with the implant material, packaging, coatings, lubricants, electronics, porous structures, and any residual-processing risks. ISO 17665 for moist heat; ISO 11135 for ethylene oxide; ISO 11137 series for radiation; ISO 14937 for general requirements for sterilizing agents; ISO 22441 for vaporized hydrogen peroxide processes. Approved sterilization specification, material compatibility assessment, product drawings, packaging configuration, and documented risk analysis. Verify that the sterilizer is qualified for the process type and load configuration. Confirm calibrated temperature, pressure, humidity, gas or radiation monitoring, and alarm systems where applicable. No unresolved material degradation, coating damage, dimensional change, corrosion, toxic residue, or packaging failure after sterilization and ageing studies.
2. Verify that the process has been formally validated Confirm that validation covers installation qualification, operational qualification, and performance qualification, including the most difficult or worst-case product and load. ISO 11135, ISO 17665, ISO 11137, or ISO 14937, according to the sterilization technology. ISO 13485 supports documented process control and validation requirements. Approved validation protocol and report, defined acceptance criteria, thermocouple or sensor mapping, load diagrams, challenge locations, deviation records, and requalification schedule. Check chamber uniformity, sensor accuracy, cycle recipes, software access control, preventive maintenance, and calibration status before relying on production results. All predefined cycle parameters and performance requirements are met at identified worst-case locations; deviations are investigated and approved before release.
3. Check the microbiological challenge and sterility assurance approach Review bioburden characterization, biological indicator strategy, process challenge devices, sterility testing, and the established sterility assurance level. ISO 11737-1 for bioburden, ISO 11737-2 for sterility tests performed during validation, ISO 11138 for biological indicators, and ISO 14937 or the applicable process-specific standard. Product bioburden trend data, organism identification when required, biological indicator certificates, inoculated challenge results, sterility-test records, and defined recovery methods. Use biological indicators suitable for the sterilization method and place them at locations representing the greatest process resistance. Confirm incubator qualification and control records. The validated process achieves the documented sterility assurance objective, commonly an SAL of 10-6 for terminally sterilized health-care products where justified by the applicable requirements.
4. Verify routine monitoring and release controls Ensure every production cycle is monitored using physical measurements and, where required, chemical or biological indicators. Confirm that release decisions are documented. ISO 11140 series for chemical indicators, ISO 11138 series for biological indicators, and the applicable sterilization-process standard. Complete cycle printouts or electronic records, indicator results, load identification, operator review, release authorization, nonconformance reports, and corrective-action records. Confirm traceable calibration of sensors and recorders. Verify that failed alarms, incomplete cycles, power interruptions, and out-of-tolerance conditions automatically trigger investigation or hold status. No product is released when critical parameters, indicator results, packaging integrity, or required documentation fail to meet the approved specification.
5. Review packaging integrity, residuals, and ongoing requalification Confirm that the sterile barrier system protects the implant through sterilization, handling, transport, storage, and the labeled shelf life. ISO 11607-1 and ISO 11607-2 for packaging systems for terminally sterilized medical devices; ISO 10993-7 may apply to ethylene oxide residuals. Seal-strength and integrity tests, distribution simulation, accelerated or real-time ageing data, environmental conditioning, residual testing where applicable, and complaint or trend reviews. Check sealing equipment settings, seal-jaw temperature and pressure, package inspection controls, storage conditions, and scheduled equipment maintenance. Sterile barrier integrity remains acceptable after validated ageing and distribution challenges; residuals meet applicable limits; requalification is completed after significant changes or at the defined interval.

Note: Sterilization cycle parameters and acceptance limits are product-, load-, equipment-, and facility-specific. They must be established and justified through documented validation rather than copied from a generic table.

Review Packaging, Labeling, and Sterility Maintenance

Before an orthopedic implant enters an operating room, inspect its packaging as carefully as the device itself.

Look for punctures, crushed corners, open seals, moisture, or broken indicators. Small damage matters. A sterile barrier is reliable only when its materials, seals, and handling process have been validated. Packaging should protect against contamination during transport and storage, not merely look clean. Review procedures against applicable standards, such as ISO 11607, and maintain complete inspection records.

In practice, rushed checks remain a recurring weakness.

Labeling must stay readable from the warehouse shelf to the surgical table.

Confirm the device name, size, lot or serial number, sterilization method, expiration date, and single-use statement. Labels should resist abrasion and remain attached under expected storage conditions. A missing or blurred label can delay verification and create avoidable risk. Staff should compare the label with accompanying records before opening the package.

That step sounds basic. It is often skipped.

Sterility maintenance depends on controlled storage, careful transport, and disciplined stock rotation.

Keep packages dry, away from sunlight, sharp objects, dust, and excessive compression. Follow the validated shelf-life claim and inspect products again before use. Do not rely on an intact outer carton alone; examine the sterile barrier directly.

If damage or uncertainty appears, quarantine the implant and follow the facility’s documented evaluation process. Near-misses deserve review, because “no incident” can hide weak habits.

Check Sterilization Records and Quality Control Data

5 Tips to Check Orthopedic Implant Sterilization Standards

Start with the sterilization record, not the implant label. Confirm the load number, cycle date, sterilizer ID, operator, and release decision. Match these details with the device’s traceability record. AAMI ST79 recommends documented monitoring for physical parameters, chemical indicators, and biological indicators. Missing one link weakens the entire review.

Check whether the recorded cycle matches the validated method. Steam cycles should align with ISO 17665, while ethylene oxide and radiation processes require relevant validation standards, including ISO 11135 and ISO 11137. Review temperature, pressure, exposure time, humidity, and dose data. Look for failed indicators, aborted cycles, and repeated reprocessing. Small gaps matter. A clean-looking spreadsheet is not proof.

Quality control data should show trends, not only pass-or-fail results. Examine biological indicator results, packaging inspections, environmental monitoring, equipment calibration, and corrective-action reports. Compare deviations across months and sterilizers. The WHO Global report on infection prevention and control states that healthcare-associated infections affect about 7% of patients in high-income countries. CDC surveillance also estimated that one in 31 hospitalized patients had an HAI on any given day. These figures do not prove a sterilization failure, but they justify careful record review. I would also ask whether staff documented an unusual odor, wet packaging, or delayed release. Human observations are imperfect, yet they can reveal process weaknesses that dashboards miss.

Confirm Compliance with Medical Device Regulations

Tip 1: Match the sterilization method to the approved device file. Confirm that the cycle, load configuration, and packaging materials match validated conditions. Check records against applicable medical device regulations, such as the EU MDR or FDA requirements. Requirements differ by market, so one certificate may not satisfy every authority.

Tip 2: Review validation evidence, not only the sterilization certificate. Look for bioburden testing, process challenge results, routine monitoring, and defined acceptance limits. For orthopedic implants, packaging integrity matters because damaged barriers can compromise sterility during transport. Inspectors should also verify calibration records and operator training. Small gaps can become serious findings.

Tip 3: Trace one implant from raw material to release. Its batch number should connect sterilization records, packaging inspection, test results, and final approval. Electronic systems help, but they are not automatically reliable. Access controls and audit trails need regular review. In practice, teams sometimes trust completed forms too quickly. A signed record can still contain a wrong load number or missing investigation. Independent quality review, supplier oversight, and documented corrective actions provide stronger evidence of compliance.

5 Tips to Check Orthopedic Implant Sterilization Standards

Use these checkpoints to confirm that an orthopedic implant’s sterilization process is supported by the appropriate international standard. The chart shows the publication year of the referenced ISO standard; always verify the current edition and applicable national medical-device regulations before approval.

FAQS

What should determine an orthopedic implant’s sterilization method?

Consider intended use, materials, coatings, instruments, packaging, and heat sensitivity. One method may not suit every component.

What sterility assurance level is commonly expected for implants entering bone?

A commonly used target is SAL 10⁻⁶. Clean surfaces alone cannot prove sterility.

Which implant areas need special sterilization testing?

Testing should challenge narrow channels, joints, porous surfaces, and other difficult locations. Easy areas are not enough.

What packaging damage can threaten sterility?

Check for punctures, crushed corners, open seals, moisture, and broken indicators. Small damage matters.

How should sterile implants be stored and transported?

Keep packages dry and away from sunlight, dust, sharp objects, and heavy compression. Inspect the sterile barrier before use.

What information should appear on an implant label?

The label should show the device name, size, batch or serial number, method, expiry date, and single-use status.

What should staff do when packaging or sterility seems uncertain?

Quarantine the implant and follow the facility’s documented evaluation process. Do not rely on an intact outer carton.

What evidence supports sterilization compliance?

Review validation studies, bioburden tests, monitoring records, packaging tests, calibration, training, and acceptance limits. Certificates alone are insufficient.

How can teams trace one implant through production?

Link its batch number with materials, sterilization, packaging checks, test results, and release approval. Electronic records still need review.

What should reusable instrument instructions include?

They should specify cleaning, drying, inspection points, and maximum reuse cycles. These details are easy to underestimate.

Conclusion

How to check the sterilization standard of orthopedic implants begins with clearly defining the required sterility level, applicable product specifications, and the implant’s material and design characteristics. Manufacturers and quality teams should verify that the selected sterilization method, equipment, and operating parameters have been properly validated for consistent performance. Validation should demonstrate that the process can achieve the required microbial reduction without damaging the implant or changing its safety and function.

The review should also cover packaging integrity, labeling accuracy, storage conditions, and the ability to maintain sterility throughout the product’s stated shelf life. Complete sterilization records, monitoring results, equipment maintenance reports, and quality control data should be checked for consistency and traceability. Finally, the entire process should be assessed against relevant medical device regulations and internal quality procedures, ensuring that any deviations are documented, investigated, and corrected before release.

Mason

Mason

Mason is a seasoned marketing professional with a deep expertise in the company's offerings and a passion for driving brand awareness. With a strong background in digital marketing strategies, he has an innate ability to connect with diverse audiences and effectively communicate product benefits.......